
Mouse Injection Guide: Intraperitoneal, Subcutaneous, Intramuscular & Intravenous Routes
Mouse Injection Guide: Intraperitoneal, Subcutaneous, Intramuscular & Intravenous Routes
Route choice and injection technique determine how much of a dose actually reaches its target, how fast, and how much stress the animal experiences. This guide covers route selection, volume and needle-gauge limits, restraint and technique, aftercare, and the readouts used to measure the response.
Browse mouse assay kits →Key takeaways
- Route determines absorption rate and maximum volume: intraperitoneal and intravenous give systemic exposure quickly, subcutaneous gives slow sustained release, intramuscular is volume-limited by the small muscle mass of a mouse.
- Dose by body weight, not by fixed volume, and weigh each animal on the day rather than relying on a strain average.
- Aspirate before injecting intraperitoneally to confirm you have not entered bowel, bladder or a vessel.
- Warming the tail dilates the lateral tail veins and is the single biggest determinant of success for intravenous injection.
- Use a fresh sterile needle per animal, and bring the substance to room temperature at physiological pH and osmolarity.
- Restraint quality matters as much as needle skill: a poorly restrained mouse causes misplaced doses and avoidable injury.
- All procedures require prior ethical approval and demonstrated competence; the figures here are typical guidance, not a substitute for your institutional limits.
Contents
- Before you start: approvals and competence
- Preparing the animal and the materials
- The injection routes
- Volume and needle-gauge reference
- Performing the injection
- Post-injection monitoring and care
- Common problems and how to avoid them
- Measuring the response
- Further reading
- Choosing a mouse assay
- Frequently asked questions
Mouse assay kits for dosing studies
Whatever the route, the experiment is only as good as the readout. The kits below cover the responses most often quantified after dosing a mouse: inflammatory cytokines, the stress axis, metabolic challenge and circulating antibody.
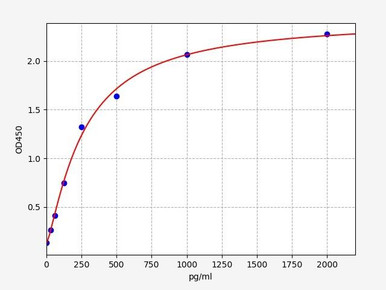
Mouse TNF-alpha ELISA Kit
Primary inflammatory readout after challenge with an immunogen or test compound.
View kit →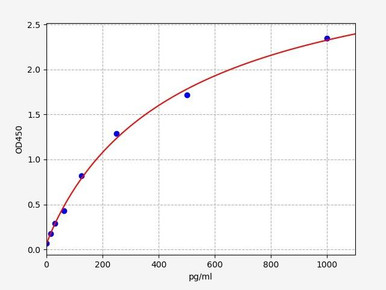
Mouse IL-6 ELISA Kit
Acute-phase cytokine that rises quickly and reliably following systemic challenge.
View kit →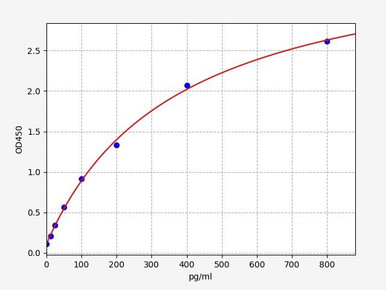
Mouse IL-1 Beta ELISA Kit
Quantifies inflammasome-driven signalling in local and systemic inflammation models.
View kit →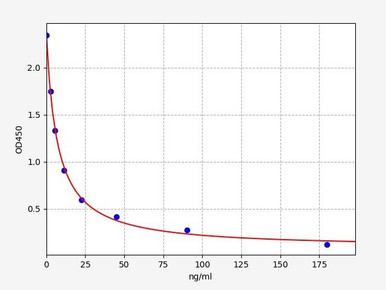
Mouse Corticosterone ELISA Kit
The rodent stress hormone — useful for confirming that handling and restraint are not confounding results.
View kit →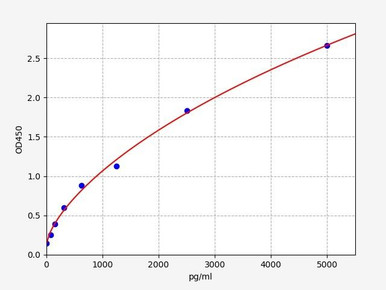
Mouse Insulin ELISA Kit
Standard endpoint for intraperitoneal glucose and insulin tolerance testing.
View kit →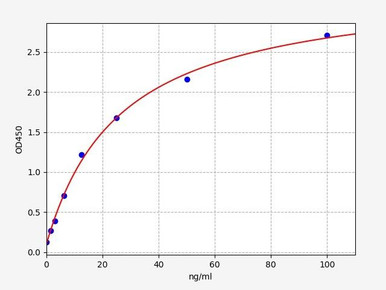
Mouse IgG / Immunoglobulin G ELISA Kit
Tracks circulating antibody for immunisation schedules and biologic exposure studies.
View kit →Before you start: approvals and competence
Injecting a mouse is a regulated procedure. Before any substance is administered you need an approved protocol from your institutional animal care and use committee or equivalent ethics body, covering the substance, route, volume, frequency and the humane endpoints that will trigger intervention. Personnel must be trained and assessed as competent on the specific route, not on injection technique in general — tail-vein injection in particular has a long learning curve and is best practised under supervision.
The 3Rs framework applies directly to route choice. Replacement asks whether an in vitro or in silico approach could answer the question instead. Reduction pushes toward designs that extract maximum information per animal, which usually means planning the readouts before the first injection. Refinement is where route selection lives: choosing the least painful route that still delivers the required exposure, minimising injection frequency, and using appropriate analgesia or anaesthesia where the procedure warrants it.
Acclimatise newly arrived animals for at least several days before dosing, and habituate them to handling beforehand. A mouse accustomed to being picked up is easier to restrain, and its baseline corticosterone will be closer to normal — which matters if stress hormones or inflammatory markers are among your endpoints.
Preparing the animal and the materials
Checking the animal
Examine each mouse before dosing. Look at coat condition, posture, respiration, responsiveness and any discharge, and check the intended injection site for existing lesions or from previous injections. An animal showing signs of illness should be recorded and excluded or treated according to your protocol rather than dosed. Weigh every animal on the day of dosing: mice vary substantially in mass even within a cage, and dose calculations are per kilogram of body weight, so a stale weight is a dosing error waiting to happen.
Preparing the substance
Substances for injection should be sterile, free of particulates, and as close to physiological pH and osmolarity as the formulation allows. Extremes of pH or tonicity cause pain and tissue damage, and are a common hidden cause of variable results. Bring solutions to room temperature before injecting — cold fluid injected intraperitoneally is aversive and can cause a transient drop in body temperature. Filter-sterilise where the formulation permits, and prepare fresh where stability is uncertain.
Syringes and needles
Match the syringe to the volume: a 1 mL syringe cannot accurately deliver 30 microlitres, so use insulin syringes or microsyringes for small volumes. Choose the finest gauge that will pass the formulation — viscous or suspension formulations need a wider bore, but a wider needle causes more tissue trauma. Use a new sterile needle for every animal. Needles blunt measurably after a single insertion, and a blunt needle requires more force, hurts more and increases the chance of misplacement. Never reuse a needle across animals, which risks cross-contamination and disease transmission.
Calculating the dose
Work from concentration and body weight to volume, then check that volume against the ceiling for your chosen route. If the required dose exceeds the volume limit, the answer is a more concentrated formulation, a split dose across multiple sites, or a different route — not exceeding the limit. Have a second person verify calculations for anything with a narrow therapeutic window.
The injection routes
Route selection follows from three questions: how fast do you need systemic exposure, how much volume must you deliver, and what are the properties of the formulation. The routes below cover almost all rodent dosing work.
Intraperitoneal (IP)
Intraperitoneal injection delivers substances into the peritoneal cavity, where the large absorptive surface and rich blood supply give rapid systemic uptake — slower than intravenous, but faster than subcutaneous. It tolerates the largest routine volumes of any non-surgical route, which makes it the default for many pharmacology, metabolic and tumour studies.
The target is the lower right or lower left quadrant of the abdomen, lateral to the midline, with the animal restrained head-down so the viscera fall away from the injection site. Insert at roughly 10 to 30 degrees to the abdominal wall and no deeper than necessary. Always draw back on the plunger before injecting: green or brown fluid means bowel, yellow means bladder, blood means a vessel. In any of those cases discard the syringe and needle and start again with fresh equipment.
Subcutaneous (SC)
Subcutaneous injection places the substance in the loose tissue beneath the skin, where absorption is slow and sustained — useful for depot formulations, slow-release compounds and hydration support. It is the least technically demanding route and among the best tolerated.
The scruff over the shoulders is the standard site, with the flank as an alternative. Tent the skin between finger and thumb, insert the needle into the base of the tent parallel to the body wall, and confirm the needle is not through the far side of the skin fold before delivering. A correctly placed dose forms a visible, freely mobile bleb that disperses over minutes. Rotate sites for repeated dosing.
Intravenous (IV)
Intravenous injection puts the entire dose into the circulation immediately, giving complete bioavailability and precise control of the exposure profile. It is the most technically demanding route in mice and the one where preparation matters most.
The lateral tail veins run along either side of the tail and are the usual target; the dorsal vein is avoided. Warm the tail first — with a heat lamp at a safe distance, a warmed cage or brief immersion in water at about 40 °C — because vasodilation transforms the visibility and calibre of the vein and is the single biggest determinant of success. Restrain the animal in a tail-access restrainer, start distally so failed attempts leave proximal sites available, and insert almost parallel to the tail with the bevel up. Correct placement gives no resistance and no subcutaneous blanching; resistance or a visible bleb means you are outside the vein, so withdraw and move proximally. Inject slowly.
Intramuscular (IM)
Intramuscular injection gives moderately rapid absorption from a well-perfused muscle bed, but a mouse has very little muscle mass, which makes this the most volume-restricted route. It is used far less often in mice than in larger species, and where a small volume must be given by a non-intravenous route, subcutaneous is often the better choice.
The caudal thigh muscles are the usual site. Immobilise the limb, insert perpendicular to the muscle belly, and keep well clear of the femur and the sciatic nerve — sciatic injury from careless intramuscular injection causes lasting lameness and self-mutilation. Aspirate to confirm you are not in a vessel, deliver slowly, and split the dose across both hind limbs rather than exceeding the per-site limit.
Intradermal (ID)
Intradermal injection deposits substances within the dermis itself, giving slow local absorption and strong engagement with skin-resident immune cells — which is why it is favoured for immunisation and delayed-hypersensitivity work. Volumes are tiny. The needle is inserted at a shallow angle, bevel up, into the skin of the flank or the base of the tail, and correct placement raises a small firm pale bleb that does not move. It requires practice, and is usually performed under anaesthesia.
Intra-articular
Intra-articular injection delivers substances directly into a joint space, most often the knee, for models of osteoarthritis, inflammatory arthritis and joint injury. Volumes are in the microlitre range and demand a microsyringe. The procedure is performed under anaesthesia with the joint flexed to open the space, approaching through the patellar ligament region. Because the target is so small, dye-injection practice on cadavers before live work is strongly advised.
Intra-defect and intra-osseous
In bone regeneration and orthopaedic research, substances are sometimes placed directly into a surgically created bone defect — delivering cells, growth factors or biomaterials exactly where healing is being assessed. This is a surgical procedure performed under general anaesthesia with full aseptic technique and postoperative analgesia, and volumes are dictated by the defect. It sits outside routine dosing and requires its own specific protocol approval.
Volume and needle-gauge reference
The figures below are widely used good-practice guidance for a healthy adult mouse of roughly 25 g. They are starting points for protocol design, not permissions — your institutional limits and your approved protocol take precedence, and repeated or chronic dosing generally warrants lower volumes than a single administration.
| Route | Typical volume limit | Needle gauge | Onset | Key caution |
|---|---|---|---|---|
| Intraperitoneal | 10 mL/kg (about 0.25 mL) | 25–27 G | Rapid | Aspirate first; avoid bowel and bladder |
| Subcutaneous | 10 mL/kg per site | 25–27 G | Slow, sustained | Confirm the bleb is under the skin, not through it |
| Intravenous (lateral tail vein) | 5 mL/kg (about 0.125 mL) as a bolus | 27–30 G | Immediate | Warm the tail; start distally; stop if resistance is felt |
| Intramuscular | ≤ 0.05 mL per site | 27–30 G | Moderate | Very limited muscle mass; avoid the sciatic nerve |
| Intradermal | ≤ 0.05 mL per site | 27–30 G | Slow, local | Shallow angle; usually under anaesthesia |
| Intra-articular (knee) | 5–10 µL | 29–31 G | Local | Microsyringe under anaesthesia; practise first |
Two practical corollaries follow from this table. First, if your dose does not fit the route, change the concentration or the route rather than the limit. Second, volume limits are per site and per occasion: splitting a subcutaneous dose across two sites is legitimate, while doubling the volume at one site is not.
Performing the injection
Restraint
Good restraint immobilises the animal without compressing the chest or abdomen. For intraperitoneal and subcutaneous work, manual restraint by the scruff with the tail secured against the palm is standard, and the animal should be held firmly enough that it cannot twist yet loosely enough to breathe freely. For intravenous injection a purpose-made tail-access restrainer is preferable, since the tail must be still and accessible. Minimise time in restraint; a mouse held too long becomes distressed and struggles more, not less.
Site selection and preparation
Choose the site according to route and rotate between sites across repeated doses so tissue can recover. Part the fur and inspect the skin. For most routine parenteral dosing in rodents, skin disinfection is not required and alcohol swabbing can be counterproductive because it cools the animal and stings broken skin; for surgical routes such as intra-defect delivery, full aseptic preparation is mandatory. Follow your local policy.
Needle insertion
Insert with a single decisive movement at the angle appropriate to the route — shallow for intradermal and intravenous, moderate for intraperitoneal, perpendicular for intramuscular. Hesitant, repeated attempts cause more trauma than one confident insertion. Bevel up is the default. Where the route calls for it, aspirate before delivering.
Delivering the dose
Inject steadily and without force. Resistance means the needle is in the wrong plane, and pushing harder will tear tissue or force fluid where it should not go. Watch the animal throughout: vocalisation, sudden struggling or laboured breathing are reasons to stop. For intravenous injection, watch the vein rather than the animal — a correctly placed dose visibly clears the vein of blood, while a bleb or blanching means the needle has slipped out.
Withdrawal
Withdraw along the line of insertion, apply brief gentle pressure if there is any bleeding, and return the animal to its cage. Dispose of the needle immediately into a sharps container without recapping. Record the dose, volume, route, site and time along with anything unusual, and observe the animal for a few minutes before leaving.
Post-injection monitoring and care
Observe animals shortly after dosing, again within a few hours, and then according to your protocol. Early signs of a problem include hunched posture, piloerection, reluctance to move, laboured breathing, abdominal guarding after intraperitoneal injection, and lameness after intramuscular injection. Check injection sites at each observation for swelling, discharge or ulceration, and check tails after intravenous work for bruising or necrosis.
Provide easy access to food and water, and consider supplementary heating for animals recovering from anaesthesia. Where the protocol anticipates discomfort, give analgesia proactively rather than waiting for signs of pain, since rodents mask pain effectively and by the time it is obvious it is well established. Record every observation, and apply the humane endpoints in your protocol without delay when they are met — that decision is easier if the thresholds were written down in advance.
Common problems and how to avoid them
- Failed tail-vein access. Almost always insufficient warming. Warm properly, start at the distal tail, and work proximally on subsequent attempts rather than repeatedly probing one spot.
- Dose delivered subcutaneously instead of intravenously. A bleb or blanching during injection is the tell. Stop, withdraw, reposition proximally, and record the animal as a partial dose rather than assuming full delivery.
- Aspirating gut contents during intraperitoneal injection. Discard needle and syringe, use fresh equipment, restrain head-down and aim more laterally. Monitor the animal closely afterwards.
- Leakage back out of the injection tract. Usually too large a volume, too fast a delivery, or withdrawal immediately after finishing. Reduce volume, slow down and pause briefly before withdrawing.
- High variability between animals given the same dose. Check that weights are current, that the formulation is homogeneous and resuspended before each draw, and that syringe size suits the volume. Route inconsistency between operators is another frequent culprit.
- Confounded stress endpoints. If corticosterone or acute-phase cytokines are among your readouts, habituate animals to handling, dose at a consistent time of day, and include a sham-injected control group.
Measuring the response
Dosing is the intervention; the data come from what you measure afterwards. In practice a small set of readouts covers most in vivo dosing work, and choosing them before the study starts usually reduces the number of animals needed.
For inflammatory and immune challenge models, TNF-alpha, IL-6 and IL-1 beta in serum or plasma capture the acute response, with sampling time critical because these cytokines peak within hours and resolve quickly. For immunisation schedules and biologic exposure studies, circulating IgG tracks the humoral response across the dosing course. For metabolic work, intraperitoneal glucose and insulin tolerance testing pairs blood glucose with insulin measurement, which is one of the most common applications of the intraperitoneal route.
Corticosterone deserves separate mention because it functions as a technique control. Restraint and injection raise corticosterone independently of the compound being tested, and glucocorticoids in turn modulate inflammatory and metabolic readouts. Including corticosterone alongside sham-injected controls lets you show that an effect belongs to your intervention rather than to the handling that delivered it. All of these markers are routinely quantified by sandwich ELISA from small serum or plasma volumes, which suits the sampling limits of a mouse.
Further reading
Two review articles are the standard references for route selection and volume limits in laboratory animals, and both are worth reading in full before designing a dosing protocol:
- Turner PV, Brabb T, Pekow C, Vasbinder MA. Administration of substances to laboratory animals: routes of administration and factors to consider. Journal of the American Association for Laboratory Animal Science, 2011;50(5):600–613.
- Diehl KH, Hull R, Morton D, et al. A good practice guide to the administration of substances and removal of blood, including routes and volumes. Journal of Applied Toxicology, 2001;21(1):15–23.
The NC3Rs also maintains freely available practical guidance on administration of substances, including technique videos, which is a useful complement to written protocols when training new personnel.
Choosing a mouse assay
Mouse ELISA kits for cytokines, hormones, metabolic markers and immunoglobulins — validated for serum, plasma, tissue lysate and cell culture supernatant, at sample volumes suited to rodent work.
Browse mouse assay kits →Frequently asked questions
How much can you safely inject into a mouse?
It depends on the route. Intraperitoneal and subcutaneous injection typically allow up to 10 mL/kg, which is roughly 0.25 mL in a 25 g mouse. An intravenous bolus is usually limited to about 5 mL/kg, and intramuscular injection to 0.05 mL per site because mice have so little muscle mass. Always defer to your approved protocol and institutional limits.
Which route gives the fastest systemic exposure?
Intravenous injection is immediate and gives complete bioavailability. Intraperitoneal is next fastest, then intramuscular, with subcutaneous the slowest and most sustained. Choose according to the exposure profile the experiment requires.
What needle gauge should I use for mouse injections?
25 to 27 gauge suits intraperitoneal and subcutaneous injection. Tail-vein, intramuscular and intradermal work needs finer needles, typically 27 to 30 gauge, and intra-articular injection needs 29 to 31 gauge with a microsyringe. Use the finest gauge the formulation will pass through.
Why does my tail-vein injection keep failing?
Almost always inadequate warming. Warming the tail dilates the lateral veins and makes them both visible and easier to enter. Start at the distal tail so that failed attempts leave proximal sites available, insert nearly parallel to the tail with the bevel up, and stop immediately if you feel resistance or see blanching.
Do I need to disinfect the skin before injecting a mouse?
For routine parenteral dosing in rodents, skin disinfection is generally not required, and alcohol swabbing can chill the animal and sting. Surgical routes such as intra-defect delivery do require full aseptic preparation. Follow your institution’s policy.
Should I aspirate before injecting?
Yes for intraperitoneal and intramuscular injection. Drawing back confirms you have not entered bowel, bladder or a blood vessel. If you aspirate gut contents, urine or blood, discard the needle and syringe and start again with fresh equipment.
How soon after dosing should I sample for cytokines?
Acute-phase cytokines such as TNF-alpha, IL-6 and IL-1 beta rise within hours and resolve quickly, so sampling time dominates the result. Pilot the time course rather than assuming a single endpoint, and keep sampling times identical across groups.
Umang Tyagi completed her Bachelor degree in Biotechnology from GGSIP University in Delhi, India and is currently pursuing a Research Masters in Medicine at University College Dublin.
Recent Posts
-
ELISA Troubleshooting: When Calculated Sample Concentrations Come Back Far Too High
QUICK ANSWER If your ELISA returns sample concentrations that are orders of magnitud …30th Jul 2026 -
ELISA Troubleshooting: When Standards Read Below the Blank
Quick answer On the GDF-6 (Growth Differentiation Factor 6) ELISA Kit, a researcher …28th Jul 2026 -
Introducing BioSymposia: The Gathering Place for Science
Announcement · Powered by Assay GenieIntroducing BioSymposia: The Gathering Place for ScienceWe’re e …21st Jul 2026