
Hemocytometer Cell Counting Procedure
Haemocytometer Cell Counting: Procedure, Calculation and Common Errors
A haemocytometer turns a known chamber volume into a cell concentration, and the whole method rests on four numbers: a 1 mm² square, a 0.1 mm depth, the 10⁻⁴ mL that gives, and the ×10⁴ multiplier that follows. This guide covers the geometry, the counting rules that determine whether your number is reproducible, viability by dye exclusion, and where manual counting should give way to an assay.
Browse viability assays →Key takeaways
- One large square is 1 mm² and the coverslip sits 0.1 mm above it, so the volume counted is 10⁻⁴ mL — which is where the ×10⁴ in the standard formula comes from.
- Cells per mL = mean count per large square × dilution factor × 10⁴.
- Apply a consistent boundary rule — count cells touching the top and left gridlines, exclude those touching bottom and right. This is the commonest source of disagreement between operators.
- Count enough cells for the number to mean anything: aim for roughly 100 or more in total, and 20 to 50 per large square. Dilute if squares are too crowded to count reliably.
- Which squares you count depends on the cell type — the four corner squares for leukocytes and most cultured lines, the central 25-square area for erythrocytes and small particles.
- Trypan blue viability is a dye-exclusion method: dead cells stain blue. If you dilute the sample 1:1 with dye, that factor of two must appear in the calculation.
- Manual counting is subjective and low-throughput; plate-based viability, proliferation and cytotoxicity assays are the appropriate tools once sample numbers rise.
Contents
- What a haemocytometer is
- The grid and the geometry
- The counting formula
- A worked example
- Which squares to count
- Step-by-step procedure
- Counting rules that decide accuracy
- Viability by dye exclusion
- Common sources of error
- When to use an assay instead
- What the numbers are used for
- Choosing assays
- Frequently asked questions
Assays alongside manual counting
A haemocytometer gives density and viability on one sample at a time. Once you are running plates, the assays below give the same information — and more — at scale.

MTT Cell Viability Assay
The standard plate-based viability readout, measuring mitochondrial reduction of MTT to formazan.
View product →
CellQuant-Lux 2.0 Luminescent Cell Viability Assay
ATP-based and highly sensitive — detects far fewer cells than manual counting can resolve.
View product →
Cell Viability Assay (Colorimetric/Fluorometric)
Flexible read mode, useful where plate reader capability or sample colour dictates the format.
View product →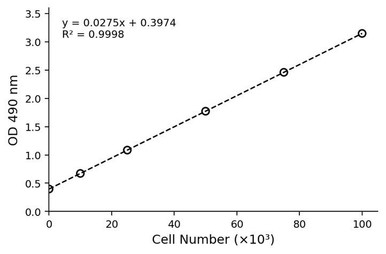
MTS Cell Proliferation Assay
Measures proliferation over time in one plate, which repeated manual counts cannot practically match.
View product →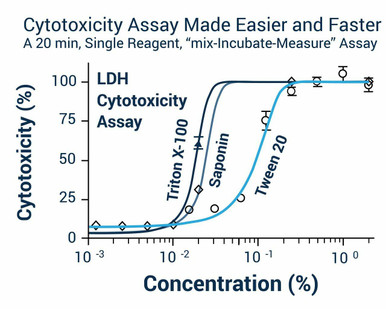
LDH Cytotoxicity Assay Kit
Quantifies membrane damage — the counterpart to viability when assessing a cytotoxic agent.
View product →
GenieColor Mycoplasma Detection Kit
Contamination depresses growth and viability while leaving cultures looking normal, confounding counts.
View product →What a haemocytometer is
A haemocytometer is a thick glass slide with a precisely etched grid and a machined recess, designed so that a coverslip rests a known distance above the grid. Because both the area of the grid squares and the depth of the gap are fixed, any square defines a known volume — and counting the cells within it gives a concentration directly.
It was developed in the second half of the nineteenth century for counting blood cells, and the design is usually credited to Louis-Charles Malassez in the 1870s, building on earlier counting chambers from the 1850s. The improved Neubauer ruling used in most laboratories today is a later refinement.
Its persistence is worth noting. It is slow, subjective and requires a microscope, yet it remains standard because it is cheap, needs no calibration, works on almost any cell type, and lets you see your cells — clumping, debris and morphology are all visible, which no automated counter reports as directly.
The grid and the geometry
The central ruled area of an improved Neubauer chamber is 3 mm × 3 mm, divided into nine large squares of 1 mm × 1 mm. Those nine squares are subdivided differently according to their purpose:
- The four corner squares are each divided into 16 medium squares. These are used for leukocytes and for most cultured cell lines.
- The central square is divided into 25 smaller squares, each further subdivided into 16. This finer ruling is used for erythrocytes, platelets and other small, abundant particles.
The coverslip sits 0.1 mm above the ruled surface. That single dimension is what converts an area into a volume:
| Region | Area | Volume at 0.1 mm depth |
|---|---|---|
| One large square | 1 mm² | 0.1 mm³ = 10⁻⁴ mL |
| Whole 3 × 3 grid | 9 mm² | 0.9 mm³ = 9 × 10⁻⁴ mL |
| One of 25 squares in the centre | 0.04 mm² | 4 × 10⁻⁶ mL |
| One of 16 squares in a corner | 0.0625 mm² | 6.25 × 10⁻⁶ mL |
Everything else in the method follows from this table. If you know which squares you counted, you know what volume you sampled.
The counting formula
For large squares, the standard formula is:
Cells per mL = (mean cells per large square) × (dilution factor) × 10⁴
The 10⁴ is not arbitrary. One large square holds 10⁻⁴ mL, and converting a count in 10⁻⁴ mL to a count in 1 mL means multiplying by 10⁴. If you understand that, you never need to memorise the formula.
Counting a different square size only changes the volume term. The general form is:
Cells per mL = (total cells counted ÷ number of squares counted) ÷ (volume of one square in mL) × dilution factor
So for the 25 smaller squares in the central region, each holding 4 × 10⁻⁶ mL, the multiplier becomes 2.5 × 10⁵ rather than 10⁴.
Do not forget the dilution factor. It must include every dilution, including the trypan blue step. Adding one volume of cell suspension to one volume of dye is a 1:2 dilution, so the factor is 2 — omitting it halves your reported density, and it is the single most common arithmetic error in this method.
A worked example
Suppose you count four large squares and obtain 31, 25, 40 and 33 cells.
- Total counted = 129 cells across 4 squares.
- Mean per large square = 129 ÷ 4 = 32.25 cells.
- Each large square = 10⁻⁴ mL, so 32.25 cells sit in 10⁻⁴ mL.
- Density = 32.25 × 10⁴ = 322,500 cells/mL.
If the sample had first been mixed 1:1 with trypan blue, the true density would be 322,500 × 2 = 645,000 cells/mL.
To then seed a new flask, the volume of suspension required is simply the target cell number divided by this density. For 2 × 10⁶ cells at 645,000 cells/mL, that is roughly 3.1 mL.
Which squares to count
| Cell type | Squares counted | Reason |
|---|---|---|
| Cultured cell lines, leukocytes | The four corner 1 mm² squares | Cells are relatively large and sparse; large squares give a usable count without excessive crowding |
| Erythrocytes, platelets | Five of the 25 small central squares | Cells are small and very abundant; the finer ruling keeps counts tractable |
| Yeast, bacteria, small particles | Central small squares, often with a deeper or shallower chamber | High concentrations require small sampling volumes |
| Very dilute samples | All nine large squares | Maximises the volume sampled to reduce counting error |
Whichever you choose, record it. A count is uninterpretable without knowing the volume it came from, and mixing square sizes between operators is a frequent cause of results that will not reconcile.
Step-by-step procedure
1. Prepare the chamber
Clean the haemocytometer and coverslip with 70% ethanol and dry with lint-free tissue. Seat the coverslip over the ruled area. On chambers with spring clips, engage them; otherwise the coverslip should sit flat with no gap.
2. Prepare the sample
Resuspend the culture thoroughly but gently — an unmixed suspension is the largest single source of error, and cells settle within a minute. For adherent cells, detach, resuspend and disperse clumps before sampling. Dilute if you expect a dense suspension, and record the dilution.
3. Add dye if measuring viability
Mix one volume of suspension with one volume of trypan blue and leave for one to two minutes. Do not leave it longer: trypan blue is itself cytotoxic, and viability falls measurably after about five minutes, so a delayed count reads artefactually low.
4. Load the chamber
Pipette roughly 10 µL to the edge of the coverslip and let capillary action draw it under. The chamber should fill evenly in one movement. Do not overfill — fluid flooding the side channels lifts the coverslip, changes the depth and invalidates the volume. If it overfills, or if bubbles form, clean and start again.
5. Let the cells settle
Wait about a minute so cells come to rest in one focal plane. Counting while they drift produces double counts and misses.
6. Count
At 100× total magnification, count the chosen squares systematically — the same path every time, typically a boustrophedon within each square — applying a consistent boundary rule. Tally live and dead separately if using dye.
7. Calculate and check
Apply the formula, including the dilution factor. Then sanity-check: counts across equivalent squares should agree within roughly 10%. Wide scatter means the suspension was not evenly mixed or the chamber loaded unevenly, and the result should be discarded rather than averaged.
Counting rules that decide accuracy
The arithmetic is trivial; reproducibility comes almost entirely from applying consistent rules.
- The boundary rule. Cells sit on gridlines. Count those touching the top and left boundaries of a square, and exclude those touching the bottom and right. Every cell is then counted exactly once across adjacent squares. Any consistent convention works — the failure mode is inconsistency between operators or between counts.
- Count enough cells. Counting is a Poisson process, so precision depends on the total counted. At 100 cells the coefficient of variation is about 10%; at 25 cells it is about 20%. Aim for 100 or more in total.
- Keep density in range. Target roughly 20 to 50 cells per large square. Above that, cells overlap and are undercounted; below about 10, the count is too imprecise. Adjust the dilution rather than tolerating either.
- Count both chamber halves. Most haemocytometers have two ruled areas. Load both, count both, and compare — disagreement is diagnostic of a loading or mixing problem.
- Handle clumps consistently. Decide in advance whether a clump counts as one cell or is estimated, and apply that decision throughout. Better still, disperse clumps before loading.
- Exclude debris. Distinguishing debris from small cells is a judgement call; dye exclusion helps, since debris typically stains.
Viability by dye exclusion
Viability measures the proportion of cells that are alive, and the haemocytometer method relies on dye exclusion: an intact plasma membrane keeps the dye out, so live cells remain unstained while dead cells take it up and appear blue.
Viability (%) = (live cells ÷ total cells) × 100
Points that affect the answer:
- Time matters. Read within one to two minutes. Trypan blue kills cells, so apparent viability declines the longer you wait.
- It measures membrane integrity, not health. A cell in early apoptosis has an intact membrane and scores as live. Dye exclusion therefore overestimates functional viability, which is one reason metabolic assays and dye exclusion often disagree.
- Healthy cultures typically exceed 90%. Below about 80% indicates a culture in difficulty, and the cause should be found before the cells are used.
- Count dead cells in the density too if you need total cell number, and live cells only if you need viable seeding density. Be explicit about which you are reporting.
Common sources of error
| Problem | Cause | Fix |
|---|---|---|
| Counts vary widely between squares | Suspension not evenly mixed, or uneven loading | Resuspend thoroughly, reload, and count both chamber halves |
| Density reported half the true value | Trypan blue dilution omitted from the calculation | Include every dilution; 1:1 with dye means a factor of 2 |
| Cells at more than one focal depth | Coverslip lifted by overfilling, or debris under it | Clean, reseat and reload with about 10 µL |
| Systematic disagreement between operators | Different boundary rules or different squares counted | Agree one convention and record which squares are used |
| Apparent viability lower than expected | Sample left in trypan blue too long | Read within one to two minutes of adding dye |
| Undercounting at high density | Overlapping cells obscure one another | Dilute to 20–50 cells per large square |
When to use an assay instead
Manual counting is the right tool for one or a few samples where you want to see the cells. It becomes the wrong tool quickly.
Automated cell counters using disposable chambers apply the same principle with image analysis, removing operator variability and taking seconds per sample. They work well for common lines with regular morphology, and less well for irregular, clumping or primary cells — where a manual count remains the reference.
Plate-based assays answer a different question at much higher throughput. Metabolic viability assays such as MTT and MTS, and ATP-based luminescent assays, report the number of metabolically active cells across a whole plate; cytotoxicity assays such as LDH release report membrane damage directly. None tells you morphology, but for dose-response work, proliferation over time, or anything involving more than a handful of conditions, they are the appropriate choice.
The two approaches also measure subtly different things, which is worth remembering when they disagree: dye exclusion reports membrane integrity, metabolic assays report metabolic activity, and a stressed culture can score differently on each.
What the numbers are used for
- Subculturing at a defined seeding density, so growth is reproducible between passages.
- Cell banking, where vials must be frozen at a known concentration to recover predictably.
- Assay set-up — flow cytometry, ELISA and plate assays all require a defined input number for results to be comparable.
- Transfection and transduction, where multiplicity of infection and reagent ratios are calculated from cell number.
- Toxicity testing, where viability before and after treatment quantifies the effect.
- Reporting, since seeding densities and viabilities belong in the methods section of any publication.
Outside mammalian cell culture, the same chamber is used to assess yeast density and viability during brewing fermentation, and to quantify pollen density in honey — both applications where a known-volume count is the established standard.
Choosing assays
Plate-based viability, proliferation and cytotoxicity assays for when manual counting no longer scales, plus mycoplasma screening to rule out the contamination that quietly distorts both growth and viability.
Browse viability & cytotoxicity assays →Frequently asked questions
What is the formula for haemocytometer cell counting?
Cells per mL = mean cells per large square × dilution factor × 10⁴. The 10⁴ arises because one 1 mm² square under a 0.1 mm coverslip gap holds 10⁻⁴ mL, so scaling to 1 mL multiplies by 10⁴.
Why multiply by 10,000?
Because the volume above one large square is 10⁻⁴ mL. Converting a count in 10⁻⁴ mL to a count per mL requires multiplying by 10⁴. If you count smaller squares the multiplier changes accordingly.
Which cells do I count if they sit on the gridlines?
Apply a consistent boundary rule: count cells touching the top and left lines of a square and exclude those touching the bottom and right. Each cell is then counted once across adjacent squares. Consistency matters more than which convention you pick.
How many cells should I count?
At least 100 in total, and ideally 20 to 50 per large square. Counting follows Poisson statistics, so precision depends on the total counted — about 10% coefficient of variation at 100 cells, roughly 20% at 25.
Do I need to include the trypan blue dilution?
Yes. Mixing one volume of cells with one volume of dye is a 1:2 dilution, so multiply by 2. Omitting it halves the reported density, and it is the most frequent arithmetic error in the method.
What does trypan blue actually measure?
Membrane integrity, not viability in a functional sense. Dead cells with compromised membranes take up the dye; cells in early apoptosis retain intact membranes and score as live. Dye exclusion therefore tends to overestimate functional viability.
When should I switch to an automated counter or an assay?
When throughput or objectivity matters more than seeing the cells. Automated counters suit regular, non-clumping lines. Plate-based viability, proliferation and cytotoxicity assays are appropriate for dose-response work and anything beyond a few conditions.
Recent Posts
-
Suspected Plague Death at a Siberian Anti-Plague Institute: What Researchers Should Know
Infectious Disease · News AnalysisSuspected Plague Death at a Siberian Anti-Plague Institute: What …6th Oct 2026 -
LPS ELISA Troubleshooting: The Importance of Sample Nature
Quick answer A researcher measuring circulating lipopolysaccharide (LPS) in human serum …25th Sep 2026 -

Sekundärantikörper wählen: Die Regel, die im Labor wirklich zählt
Sekundärantikörper wählen: Die Regel, die im Labor wirklich zählt Wählen Sie einen Sekundärantikörp …24th Sep 2026